An exploration on how the Klondike Derby works, and the overall mechanics of the district program.
Show Notes:
- Klondike Derby Sled Design (as shown in video)
- Klondike Sled plans (Boy’s Life)
- Typical Klondike Events: Hudson Vally, Theodore Roosevelt Council
Transcript:
A Klondike Derby is usually a district event in cold weather. The general theme is to train scouts to work together in less than ideal conditions to complete tasks. As such, in my District, the Klondike Derby is held in January or February and all the activities are in the elements.
My troop has participated in the Klondike Derby when there was a foot of snow on the ground and when it was warm and the scouts were running around in t-shirts. Weather, as you know can be very unpredictable.
The derby itself has a few moving parts, the first is the set of events. In our council we use the same events each year. These tried and true chestnuts range from fire building to memory games to lashing activities.
Along with the activities, the Klondike is unlike other district events, where the materials are supplied at the event. In a Klondike, the patrol of scouts is supposed to carry along all the materials they need to participate in the events.
This included all the hats and gloves and coats needed to work in the outdoors. If they are not wearing it, it gets brought along on the sled.
This is also another reason why the events do not change yearly, as many troops, mine included have a cache of items we put aside that is just used for the Klondike, and troop activities to train for the Klondike.
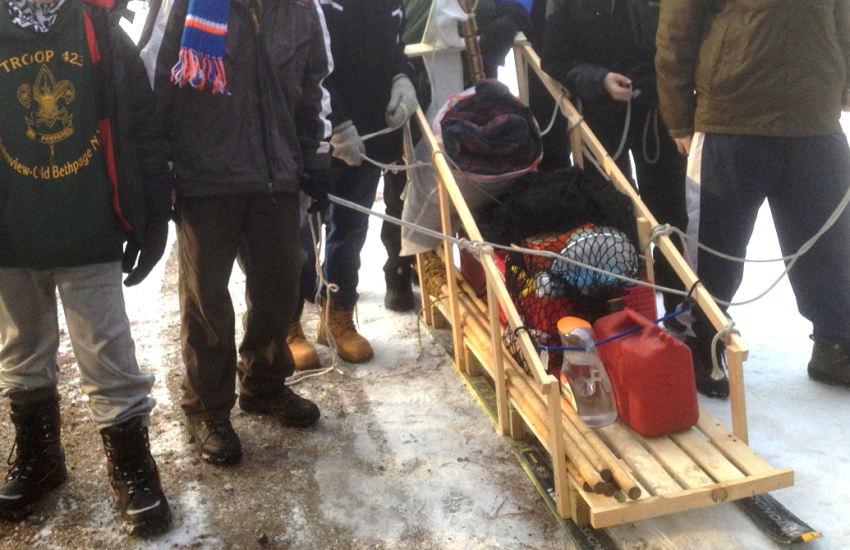
As touched on, one of the biggest moving parts is the Klondike sled. The sled is something the troop or patrol fashions to participate in the event.
There are standard configurations for a sled. In short the sled needs to be pulled by the scouts, it need skis to slide on the ground, leaves, mud or preferably snow. The sled has some way to have items either strapped to it, or carried inside of it.
Items it needs to hold include clothing, spars and rope for lashing, first aid kit and lunch for each person, as the scouts are supposed to eat in place, wherever they are on the course, when it’s time for lunch.
There are a few things we learned over the years when making the sleds. First, you can usually get free or cheap skis at ski rental places, they don’t need to be the best quality, anything structurally sound they were tossing out works.
Also, the sleds get a lot of abuse on the trail, so while you want to keep it as light as possible, where you have the option to use 1 ½ inch pine, you are better off with 3 inch pine for the sideboards, and better for the main boards.
Our first set of sleds met an untimely end during the sled race one year, when the boys decided to try and make a sharp turn, instead of a wide half circle.
One of the big things we learned, and compensated for when we re-built our sleds, was transportation of the sleds.
A sled, as you see in this example is pretty high, and while it’s not very wide, it is bulky. And if your troop is like mine and has more than one sled, then transporting it can be a big problem unless your troop has someone with a panel van or truck.
Some years, we get lucky and some years not, so when we needed new sleds I redesigned it like this. The sides move up on a pivot, and it stores pretty flat.
We also made it fit a standard size milk crate, so we can plop it in as the basket, which makes it easy, and light, as anything made in wood would have been heavier.
I’ve included the plans to this in the show notes, and other resources for Klondikes. But this is what works for us.
Take what you like and leave the rest, and as we say in Woodbadge, feedback is a gift, leave yours below in the comments, with the hope we can all learn together.
I’m Scoutmaster Dave, and this was a bit on the Klondike Derby.
